#
How To Use
ScriptStar brings text-based editing to Final Cut Pro.
It converts Final Cut Pro’s built-in transcripts into named favorite ranges on the same browser clips. This lets you see exactly what was said, instantly select it, and add it to your timeline.
#
Intro Video
#
Instructions
The below documentation is for ScriptStar v1.3.3.
To start, import your clips into a Final Cut Pro library as usual, and organize them into events if you like.
By default in Final Cut Pro v12 (lifetime/perpetual) and Final Cut Pro Creator Studio v12 (subscription), Transcribe in English is enabled by default.
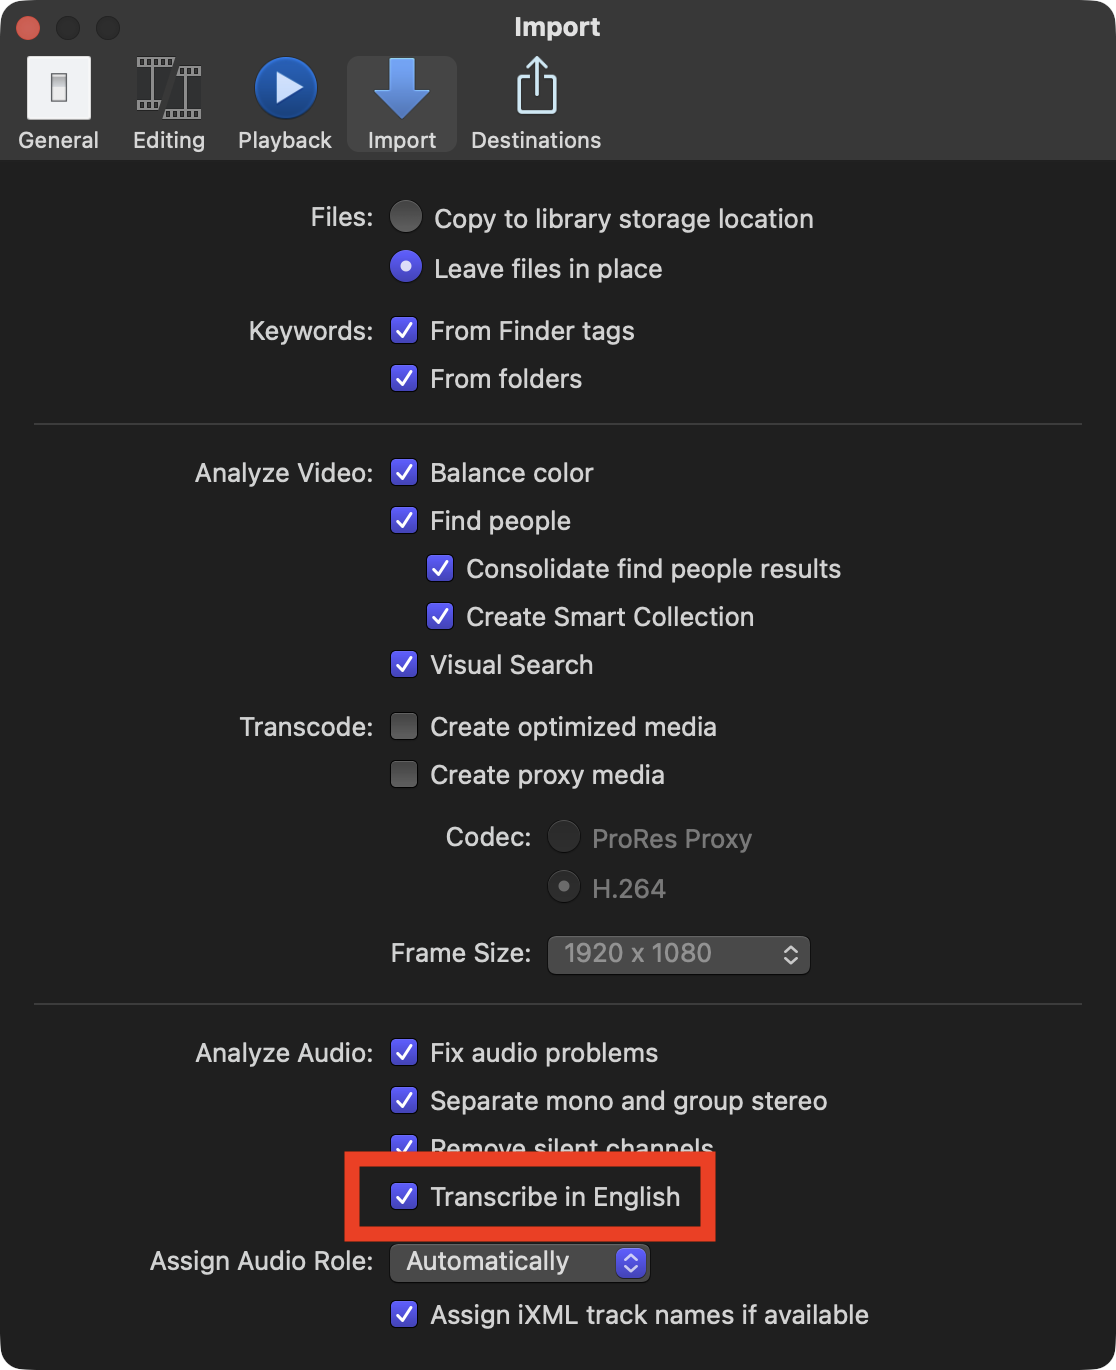
ScriptStar uses this transcription data. However, if you didn't transcribe your clips on import (which will be the case if your library was created before FCP 12) then you can transcribe them now. Select one or many clips, right-click, choose Analyze and Fix, and check Transcribe in English in the dialog that appears.
However, If you'd prefer to use your own transcripts, which is necessary for non-English captions, you can provide an SRT file that will be used in place of the built-in transcripts.
#
Launch ScriptStar
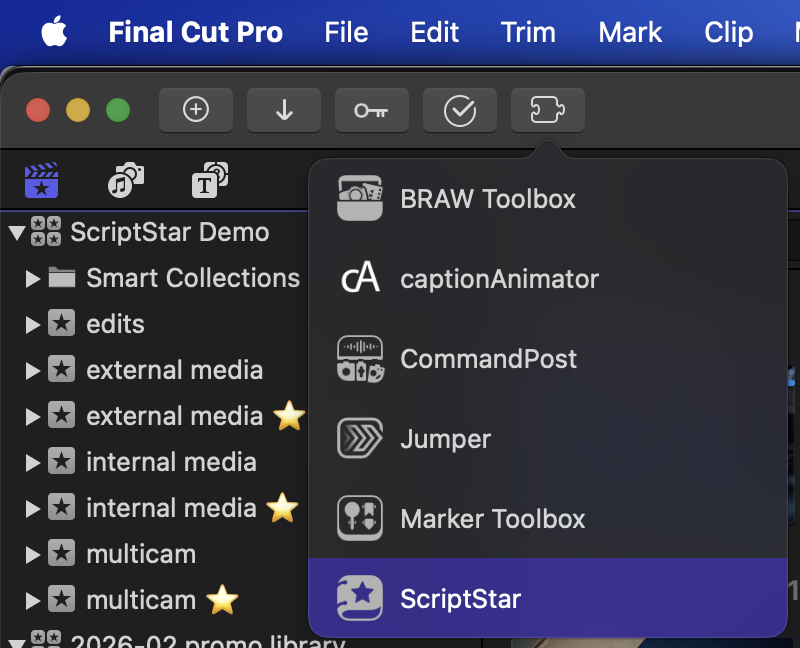
With clips transcribed, you can now launch ScriptStar from either your /Applications folder, or via the Final Cut Pro Workflow Extensions button in the toolbar and menubar.
#
Drag a Library or Event(s) to ScriptStar
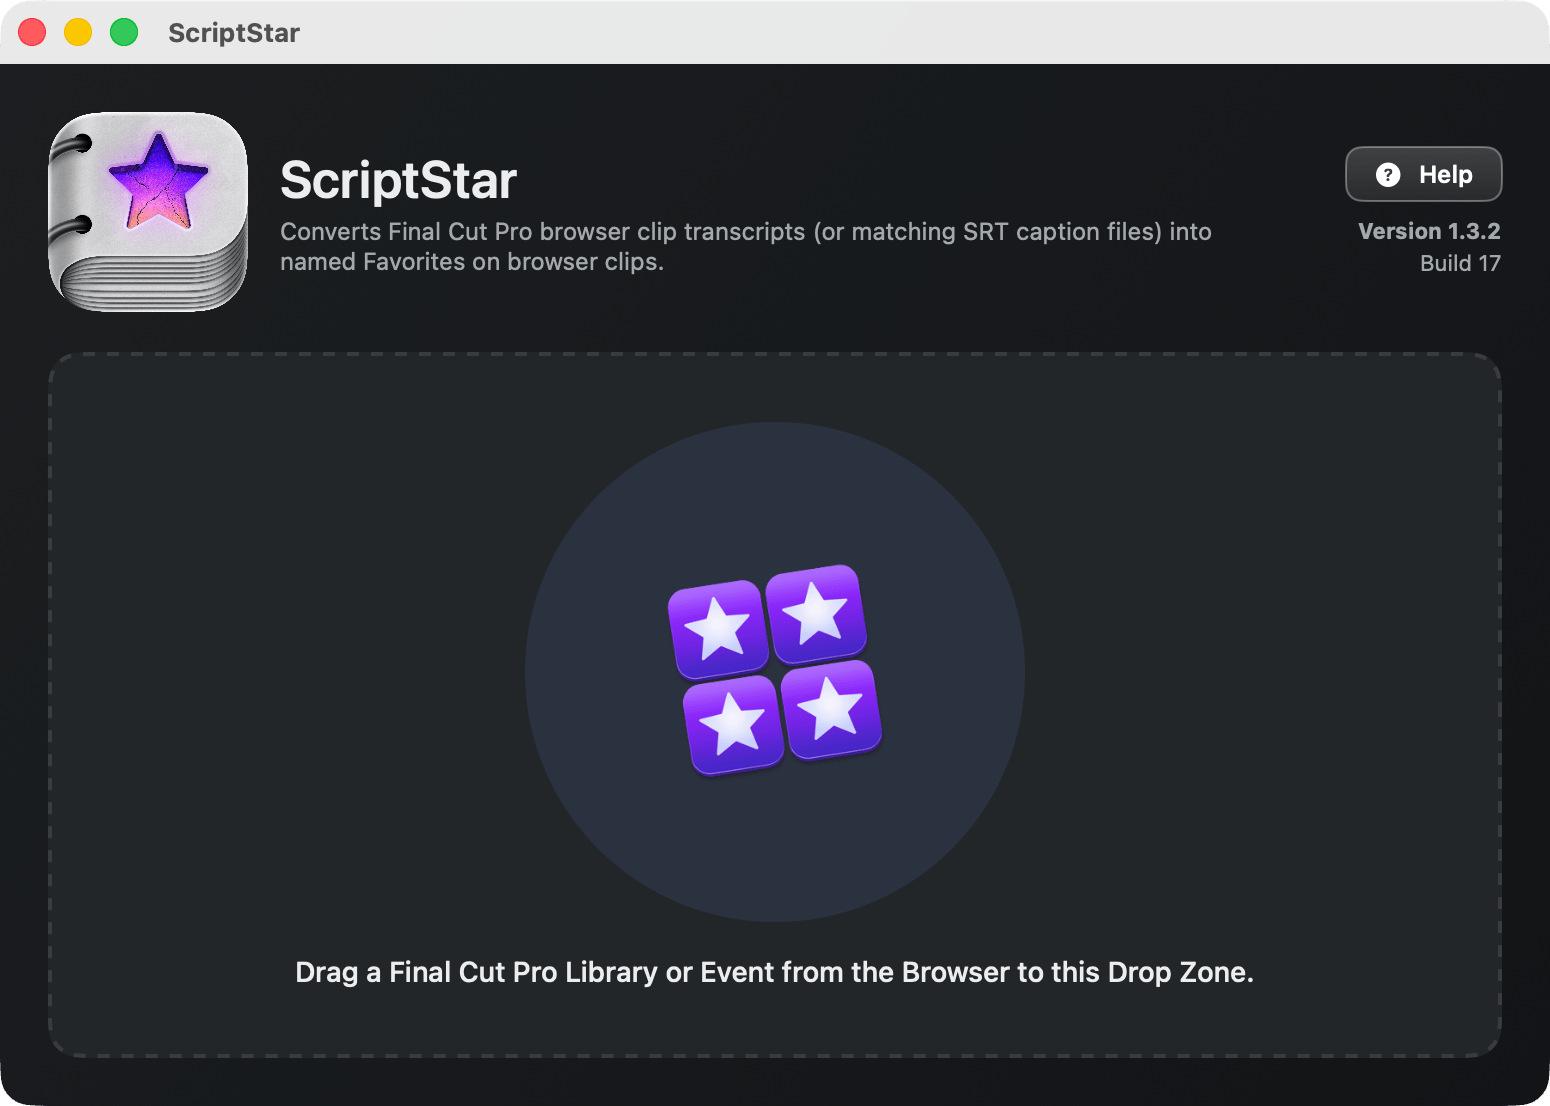
Once launched, simply drag your Final Cut Pro Library or one or more Final Cut Pro Events from the Final Cut Pro Browser interface into the drop zone in ScriptStar to get started.
If you dragged one or more Events, you will now have to locate the Final Cut Pro library in the Finder — the Library's location isn't included in data dragged from Events.
If you dragged in a Library, you will also need to locate the Library in the Finder, but the location will be chosen for you, and this process is only needed the first time you work with a new Library. (This is necessary due to sandboxing requirements.)
To recap, you first need to drag the Final Cut Pro Library or Event to ScriptStar from the Final Cut Pro interface, and then, if asked, locate the Library in the Finder.
#
Which should you choose to drag in, a Library or an Event?
- In most circumstances, we recommend dragging a Library. The process is simpler, and as ScriptStar is told the location of the Library, you can save a step. However, if you're working with larger Libraries, dragging in just one or two of your Events may process more quickly.
- Working with Events can also avoid some issues we've seen with FCP. Specifically, if you have some kinds of PDFs stored in your Library, you may not be able to export and then re-import an FCPXML file of that Library back into Final Cut Pro — even if you don't use ScriptStar at all! This issue impacts ScriptStar's Library-level processing, so if you have problems working with Libraries, try just one Event (containing transcribed interviews) instead.
#
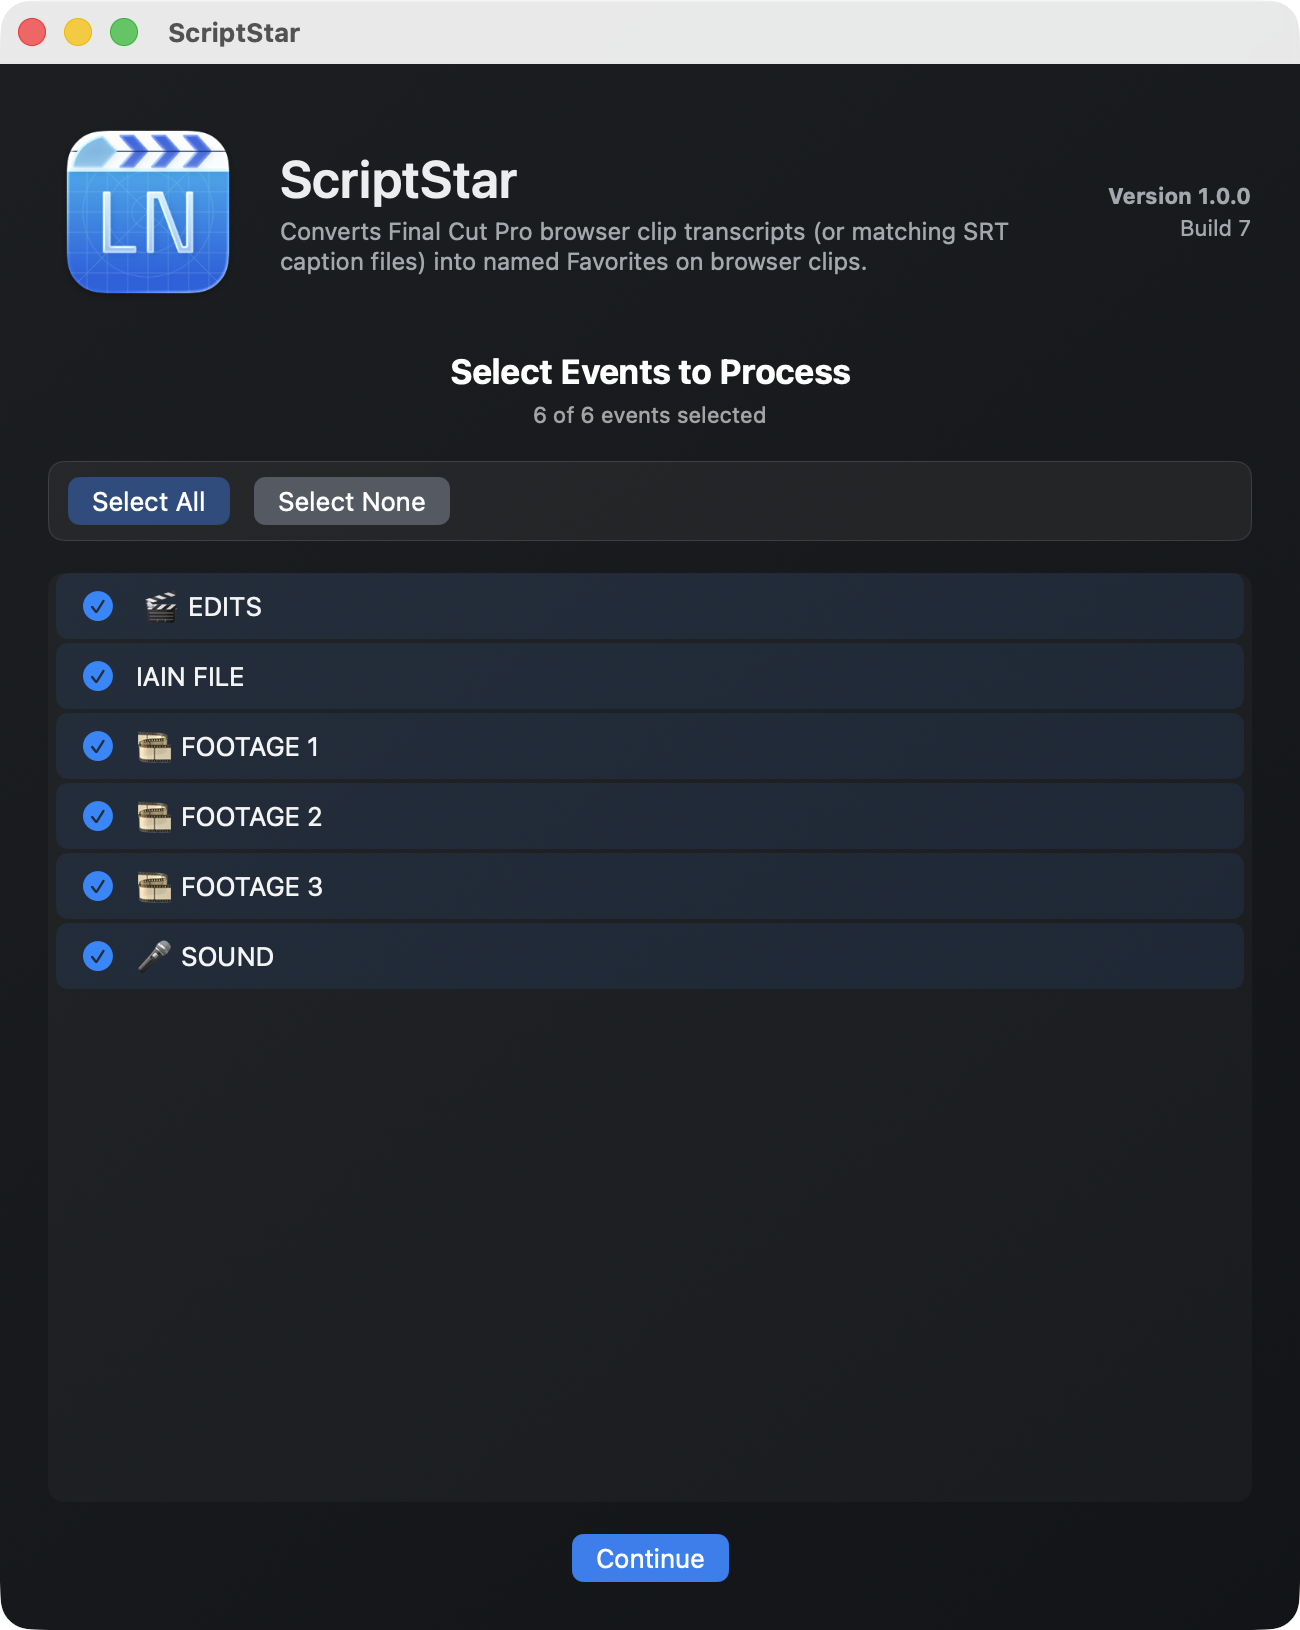
Choose one or move Events to process
If you've chosen a Library, or more than one Event, you should now choose the Events you want to process, then press Continue.
#
Optional: Add SRT files and/or choose alternative workflows
At this point you can replace any of the built-in transcripts by dragging in SRT files that match the names of any of your existing clips.
This is great for foreign languages, if you’ve had clips transcribed or edited by humans, or if Final Cut Pro’s transcript hasn’t worked or has poor results.
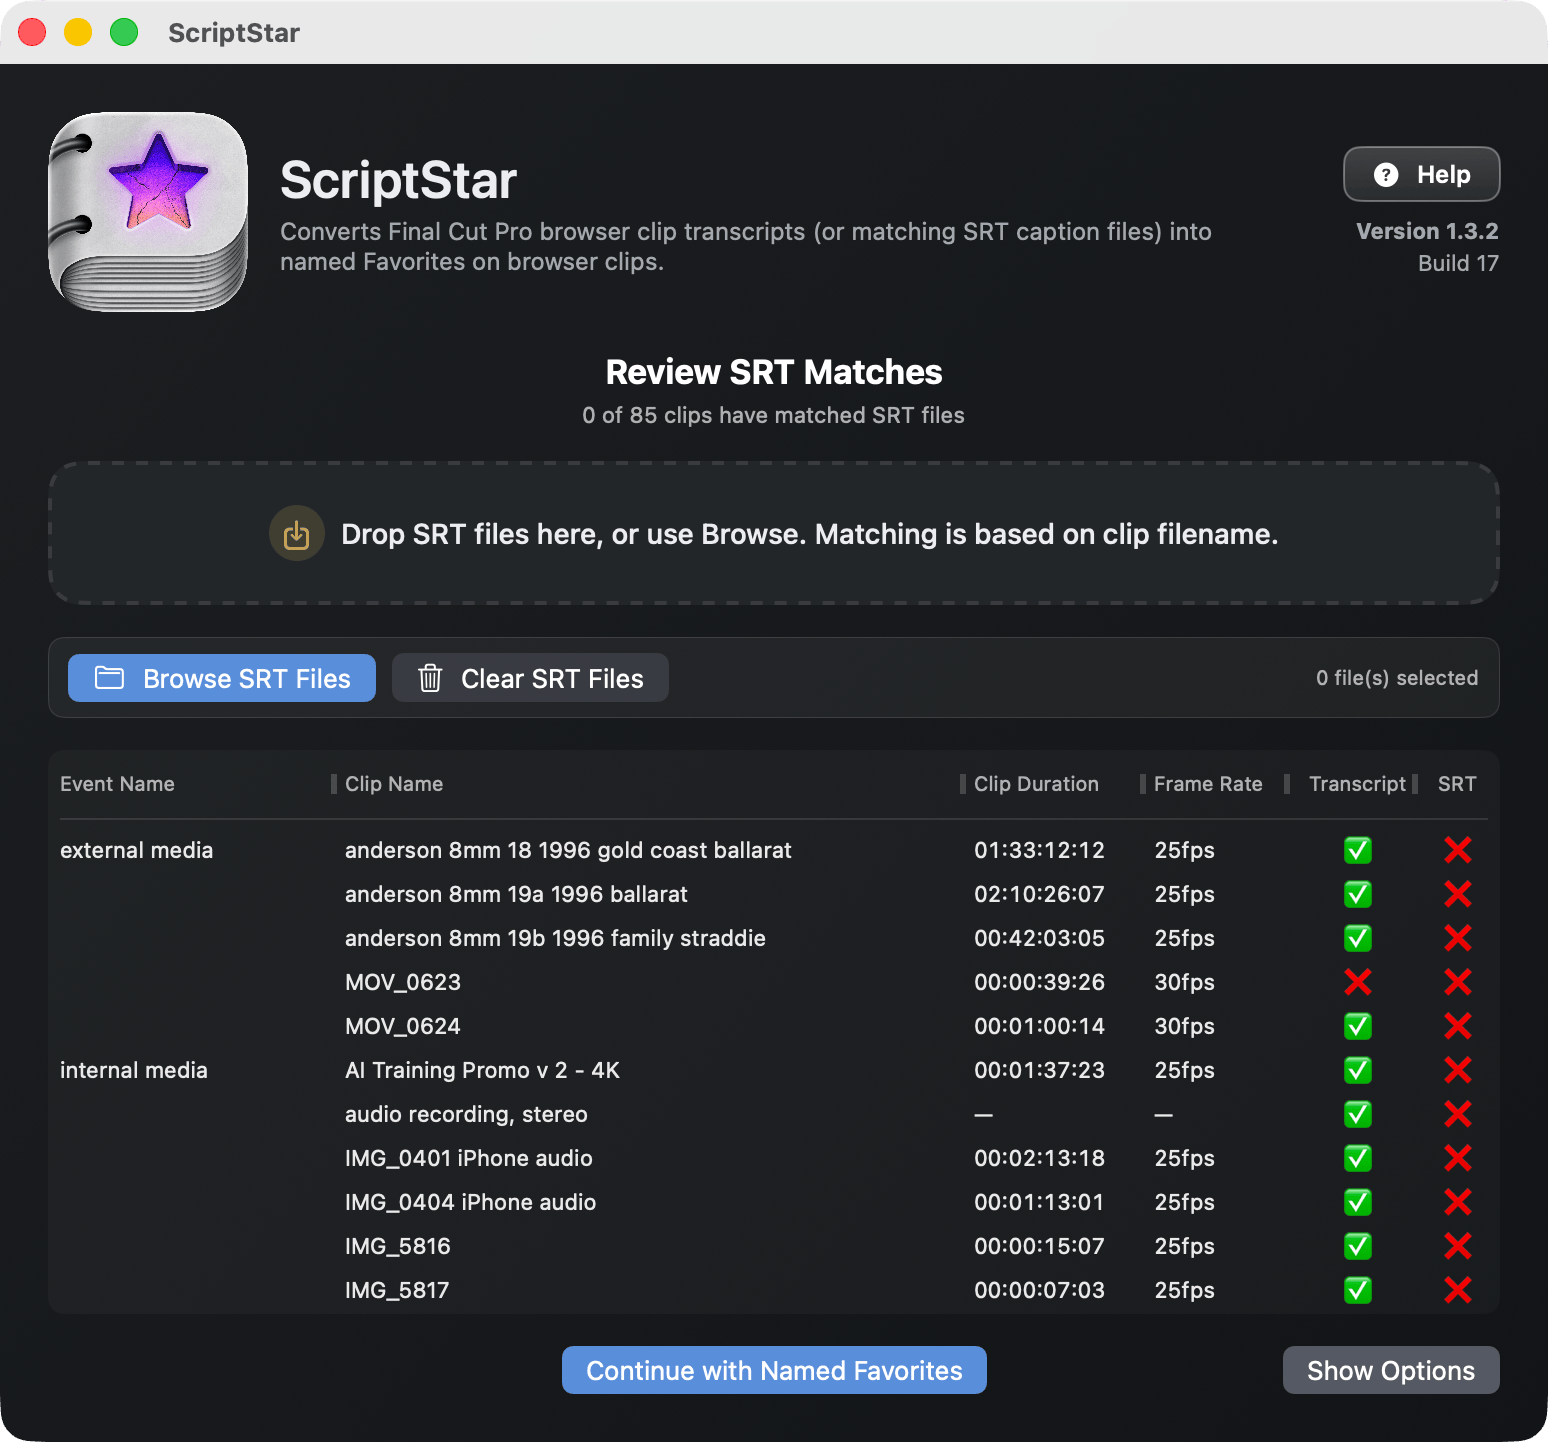
Press Continue to send the named favorites back to Final Cut Pro. (For alternative workflows, you can press Show Options in the lower right corner — more on those at the end of this page.)
#
Transcripts are sent to Final Cut Pro
Transcripted versions of your clips will appear in new events with a ⭐️ at the end of the name.
Before you leave ScriptStar, there’s one more optional step.
#
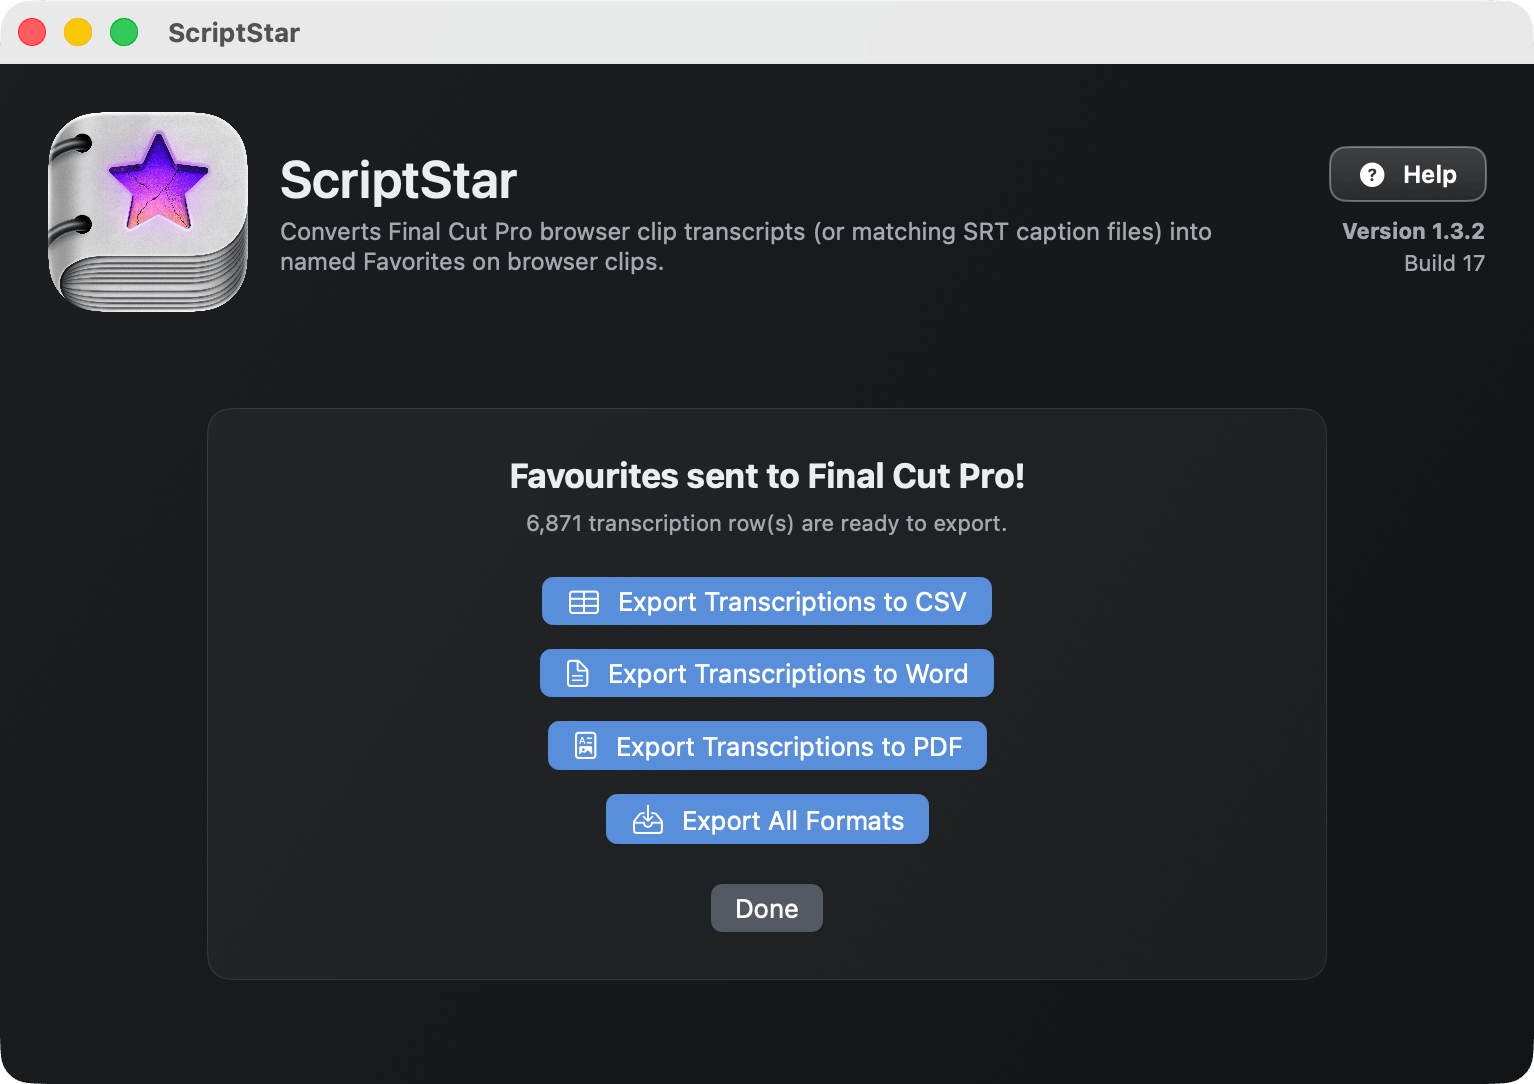
Optional: Export text transcripts from ScriptStar
If you want to send your clients a timed transcript, so they can highlight the most important phrases in interviews, or if you'd found it useful yourself, you can now export those transcripts in whatever format suits your workflow.
Formats include CSV, Word and PDF, and if you want all three, press the last button in the list.
#
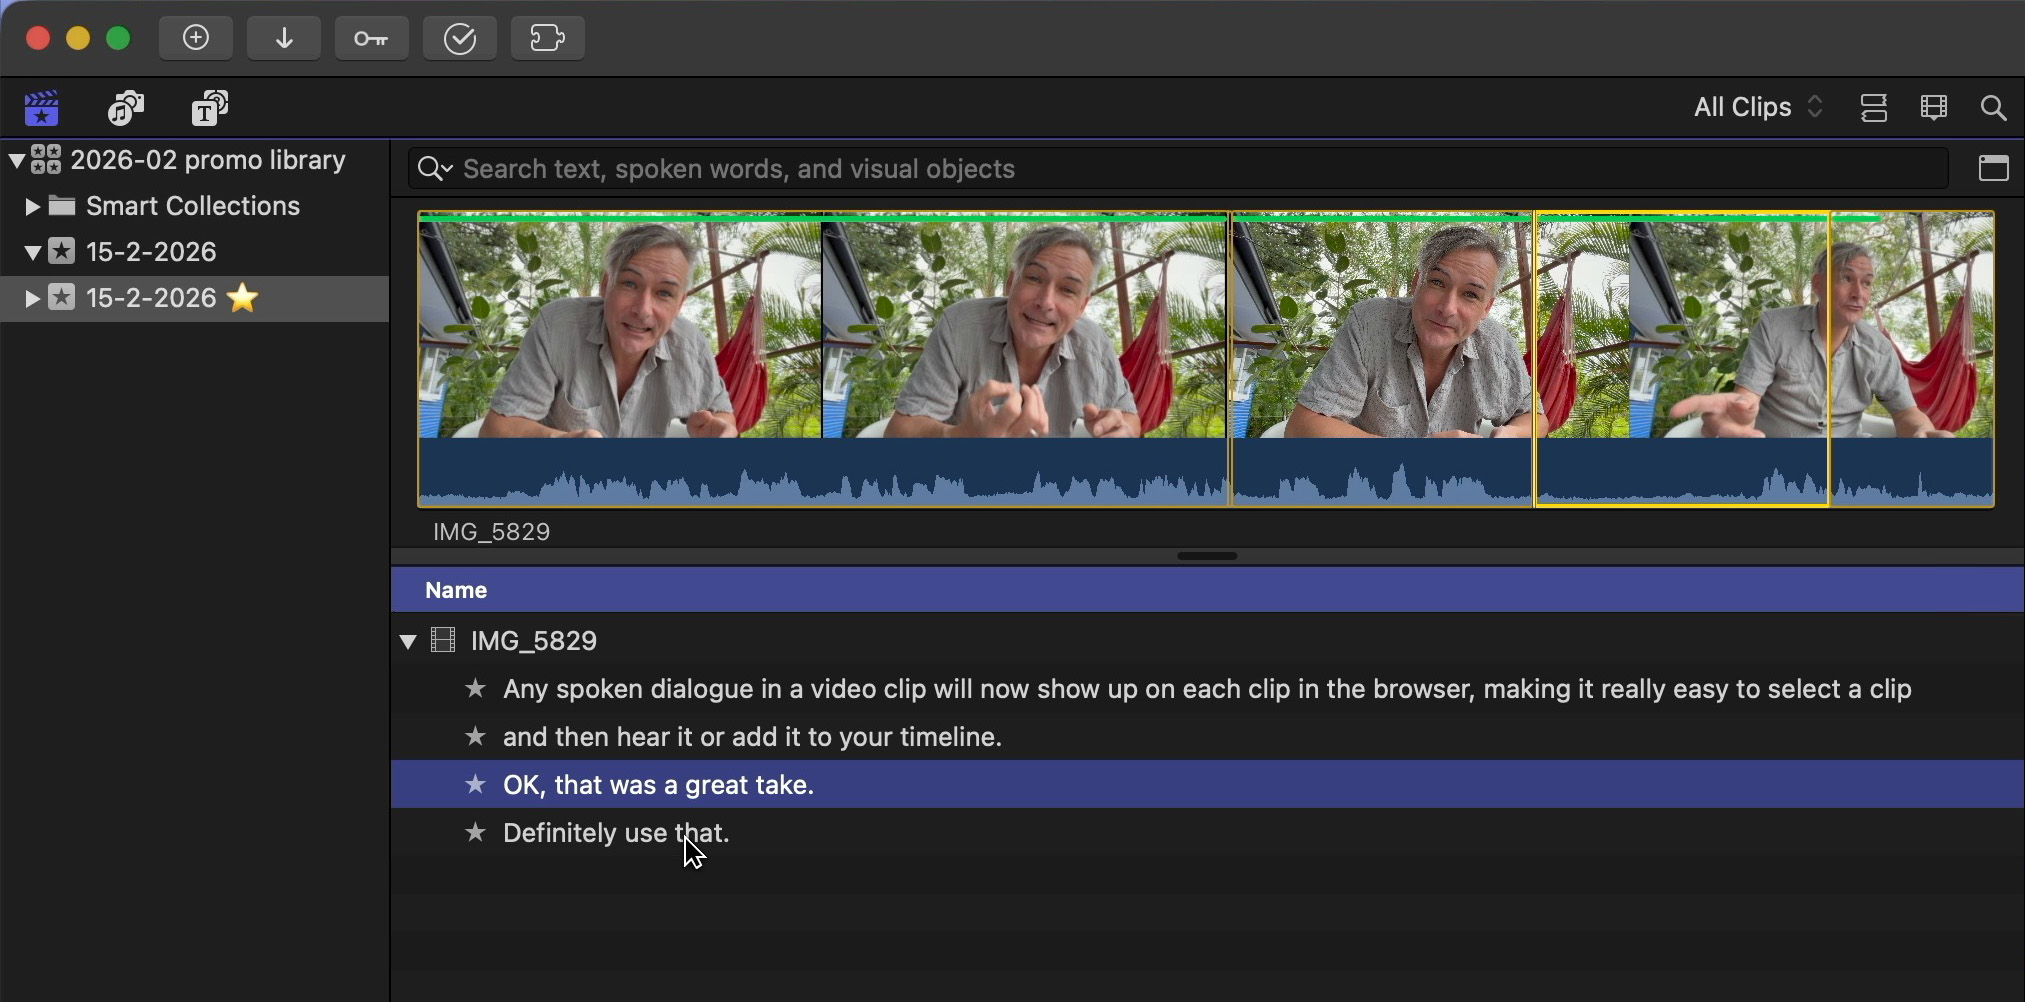
Using the transcripts in Final Cut Pro
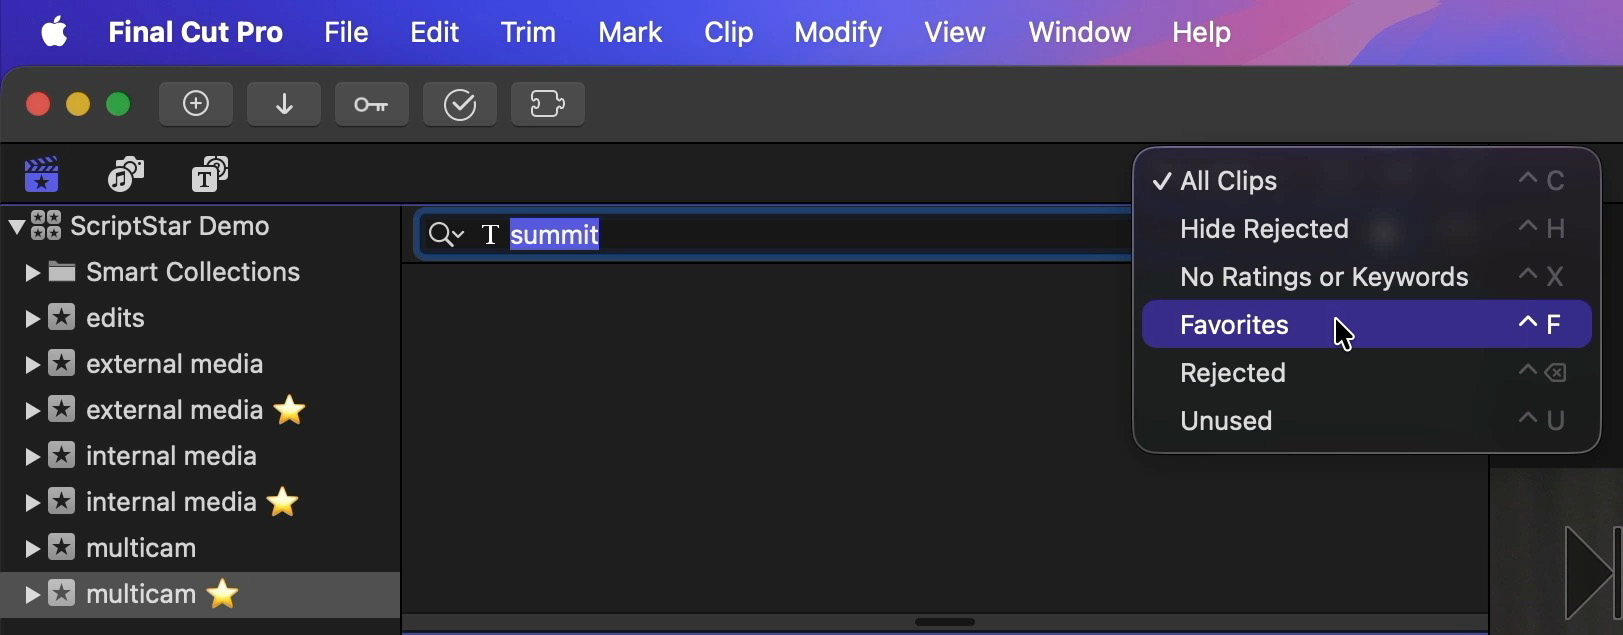
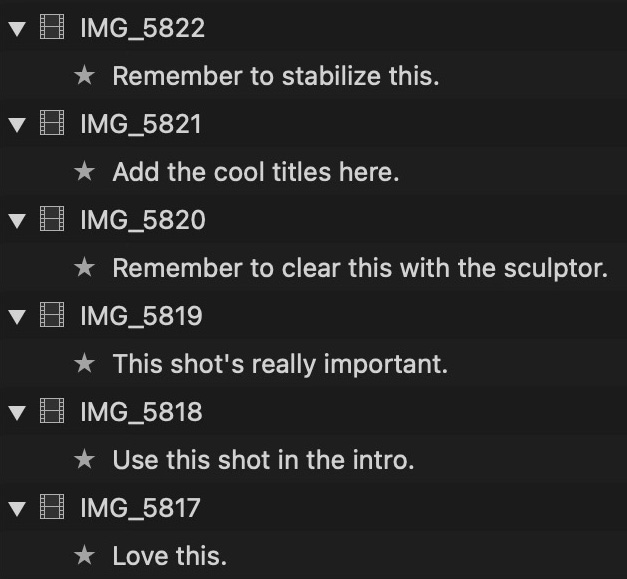
Back in Final Cut Pro, look for the events with the ⭐️ in the name, and twirl each clip’s disclosure triangle to see every line of transcribed dialogue.
Select a line, play it back by pressing / (slash), then drag it to a timeline or tap E to append it.
The transcript search in Final Cut Pro still works, but if you want to search through the named favorites, choose Favorites in the Clip Filtering menu. If you don't do this, searches return the entire source clip.
Scriptstar works with regular clips and Multicam clips, and it's a great way to find not just dialogue, but anything said out loud during a shoot.
If something great just happened, or there's anything else you need to remember, say it out loud and you'll see it in your Browser during the edit.
Lastly, if you had already applied Favorite ranges to clips or clip ranges before using ScriptStar, they will be converted into a new keyword called Favorites ⭐️. Each converted event will include this keyword collection, and you can apply this keyword the same way you would have applied favorites before.
For example, you can now select any line of dialogue, then drag it directly into the Favorites ⭐️ keyword collection to tag it.
However, if you wish to continue to use traditional Favorites to organize B-roll clips, while using ScriptStar's transcript favorites and Favorites ⭐️ keywords to organize A-roll clips, that's easy. Simply move these two types of clips into separate events, and don't process the event containing the B-roll clips.
#
Show Options and Alternative workflows
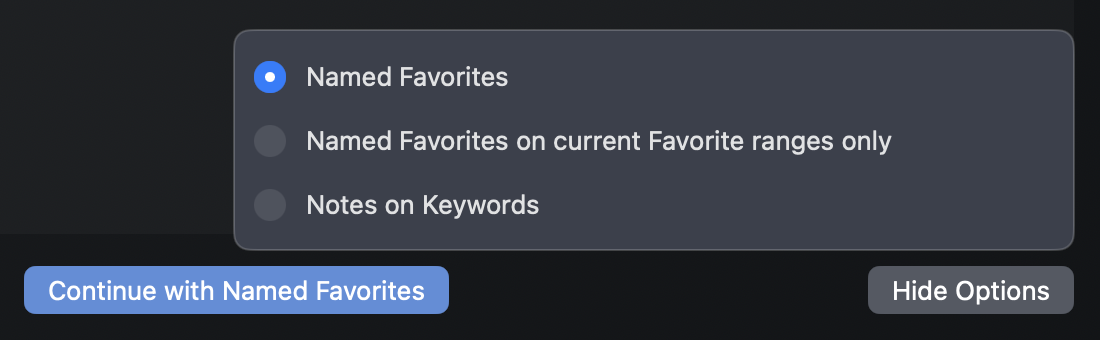
At the final stage before processing, where SRTs can be added, the Show Options button allows two alternative workflows to be chosen. When you press Show Options, a panel appears with three choices:
- Named Favorites
- Named Favorites on current Favorite ranges only
- Notes on Keywords
Named Favorites is the default, and will follow the workflow outlined above, placing transcripts onto Named Favorites, and existing Favorites onto the Favorites ⭐️ keyword.
Named Favorites on current Favorite ranges only does just that — it only add transcripts onto ranges of clips where Favorites have already been marked.
This will suit users who like to Favorite their clips before adding transcripts, and who only want to see transcripts in those areas. However, as no transcripts will be added outside these Favorite ranges, it may be harder to find additional lines of dialogue.
Notes on Keywords keeps favorites intact, but it changes the way you’ll need to interact with transcripted clips inside FCP.
We only recommend Notes on Keywords for advanced users.
Instead of using Favorite to store the transcript, this alternate mode makes keyword ranges for each line of dialogue, all with the same name (⭐️) and puts the transcripts on each instance’s notes field.
This means existing Favorites and related functionality are maintained — allowing you to search for Favorites across an entire library — but it has two downsides.
The transcript is now in the Notes category, so you’ll have to make sure it’s wide enough to see the transcript. If you were already using clip names to carry information this may leave you a little short of space.
Searching for a specific line now uses a different workflow to the Named Favorites mode, in which you simply select “Favorites” in the Clip Filtering menu as you search. In Notes on Keywords mode, you must select the ⭐️ keyword collection (instead of choosing Favorites) to see single lines in search results.
To remind you which way an event was processed, check the suffix after the event name.
- Named Favorites ⭐️
- Named Favorites on current Favorite ranges only ⭐️✅
- Notes on Keywords ⭐️🔑